The Photo Wall: Every Bohemian Decorator’s Dream
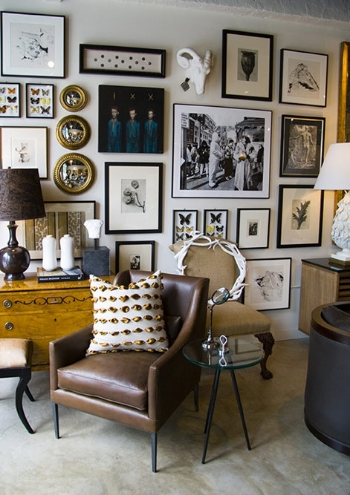
Megan Gardner Art Wall
Some people like simple spaces, clean lines, black leather furniture, and chrome appliances. But not you, Bohemian designer, not you. It’s all about the tapestries and the candles, the disparate patterns, the Jean-Michel Basquiat reprints, and the piles of Dickinson and Whitman spilling from the desk onto the floor. While some who enter your home may think this is an accident or disorganization, it’s actually your modus operandi, and completely intentional. And the piece de resistance is the photo wall.
The photo wall is one of the trickiest forms of acrobatics known to man. Sure, the first two or three are easy to hang, but then you hit a wall—literally. Even if you’ve carefully mapped out everything on the living room floor before hanging, you didn’t pay attention to the fact that some had wire hangers, some had keyholes, others had sawtooth hangers, and others had the dreaded double keyholes—the wall-hanging equivalent of senior level quantum physics.
If we told you it was possible to create an entire photo wall with each picture frame perfectly level in an hour, regardless of hanger type, would you believe us? Probably not, until you tried to hang pictures with YOUHANGIT, utilizing the hands-free level and the patented “Peel, Stick, Level, Squish” YHI method. If you are a picture wall fanatic, YHI will revolutionize your world.
Regardless of the number of photos or framed artwork pieces you want on that wall, you can hang pictures quickly and easily while also forgoing the arsenal of tools generally associated with hanging artwork, mirrors, photos, and shelves. So how do you create a picture wall? There are some quick tips for hanging framed artwork you’ll want to begin with before you peel the sticker off your first YOUHANGIT.
To begin, the right music is a must. Set your iTunes to Joni Mitchell/James Taylor shuffle immediately.
Next, take your beloved pile of pictures and framed art and map them out on the floor exactly how you’d like to see them up on the wall. Make sure the space you are using on the floor matches the space you have to work with on the wall. This will mean using a tape measure.
Begin hanging from the center out, almost like a Fibonacci sequence to make the perfect square spaces in which to fit the items that will go up next. You may hit the ghastly task of hanging a double keyhole picture first or later on, but regardless, remember, it is this simple:
· Peel the stickers off of two YOUHANGITs
· Stick one YOUHANGIT over each keyhole
· Look at the YOULEVEL you’ve slid into the space between the frame and the photo to ensure it is level
· Squish the framed item into the wall
· Pull away from the wall, and use the perfect marks made by the YOUHANGIT to apply your drywall screw anchors
As you move on to the next several photos, remember that having learned how to hang a double keyhole picture makes you the most rough and tumble photo hanger in the world. If you can do that, you can do anything. So burn that sage wand, strum that mandolin, and enjoy your new photo wall!